Taking succulent portraits is super easy, but people tend to over complicate the situation. All you really need is an iPhone (or other mobile camera) and a simple editing app, like VSCOcam. Succulent portraiture in particular is wonderfully simple, as the subject is very obedient and abundant. My large succulent collection keeps me continuously stimulated and inspired by having them around me. The character and mood of the plant is very evident; as with people, each succulent has a feel and personality, which I try to capture.
I have chosen to do succulent portraits mainly because of my love for them. Not only are they are so diverse, colorful, and weird, but their structure is architectural, iconic, and wonderfully symmetrical. They never cease to amaze me.
What you'll need:
- Succulents
- iPhone (or other mobile phone with a camera)
- VSCOcam
Step 1: See What You Want To Capture
The initial step is to actually see what you want to capture. I become visually excited all the time by things that I see around me. I'm able to capture some of these moments, but quite often they escape me, which is part of the excitement. The first capture however is always with my eye. After identifying my subject, I go about taking the photo to best capture what excited me in the first place–a shape, color, or visually appealing light.
Before taking the photo, I always consider two things: focus and light.
Focus: If the image is not crisply in focus it looses appeal immediately. Creating a depth of field by focusing on one point and allowing the background to blur is a wonderful way to bring attention to a specific area of the subject.
Light: Try to avoid harsh midday light. Early morning and late afternoon are the best times to take photos, as the light is less intense. The same photo taken at different times during the day will evoke a different feeling. You can use this to capture the feeling you are going for.
Step 2: Take Your Photo Using VSCOcam
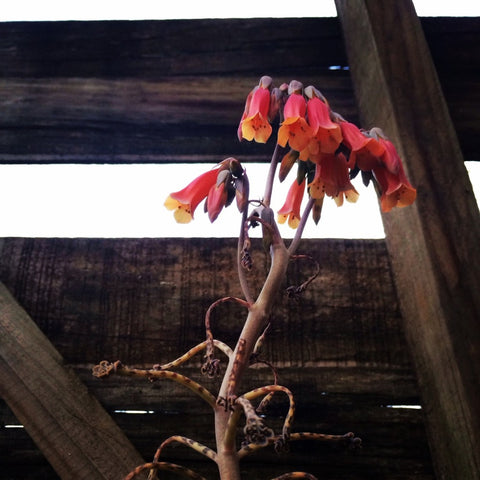
This pic was taken in a little wooden shed in my garden. One of the planks had fallen away and a wonderful light was coming in, illuminating the flowers of the Kalanchoe.
Usually when shooting into that beam of light, the subject matter and everything else disappears into darkness.  VSCOcam is great for this situation. In VSCOcam when you touch your screen with 2 fingers simultaneously and 2 circles will appear, one which says FOCUS and the other EXPOSURE. You can drag these around your pic. I positioned the focus button on the point of focus, and the exposure button to the darkest area of the pic. This opens up the aperture allowing the darker areas to become visible. When I was happy with the focus and exposure, I took the photograph, touching the camera button at the bottom of the screen.
I take all of my photos with my iPhone 5; it's convenient, always available, and actually has a pretty good camera. I often get carried away and take far more photos than is necessary, but I can usually find one good shot among them. I start by eliminating the poor photos, identifying the best of the bunch, and then going through the editing process. Sometimes if the light is just right there is no need to edit, but if I want to enhance something that appeals to me, or give it a particular feel or mood, editing can be extremely important.
Step 3: Edit Using VSCOcam
Now in VSCOcam choose the image you would like to edit, double tapping to open it up. Select the tools icon. This will give you a whole lot of filter options to choose from. Scroll across to choose from these, or scroll down and select the spanner icon to go to further options. There are 5 icons on the menu - from left to right, exposure, temperature, contrast, rotate and crop. For the purposes of this tutorial, we will be focusing on these 5 tools.
First I took the exposure down to - 3. Selecting the tick to accept the change
The Temperature I kept the same - no change.


Contrast I took up to + 4. Again, touching the tick to accept the change.
Rotate will change the angle and turn the pic around. I didn't use this this time, but I often do, as the angle or line is often off. Sometimes it's fun to flip the pic right around.
Finally, crop the pic. Cropping refers to the removal of the outer parts of an image to improve framing, accentuate subject matter, or change aspect ratio. Cropping is a good way to eliminate something that is unwanted or unnecessary, but what often makes a pic interesting are the lines (horizontal, vertical, diagonal and curved) which might run through the photo. They often create shapes, interest, and balance in a composition.
I used a square format, wanting to post it on Instagram, and moved the image within the square until I was happy with the composition and the most important elements were visible.


Finally, before publishing a pic, when looking at it, it must make my heart sing. By passing this critical test, I'm hopefully my images will have the same effect on someone else when they see them. Below is my final, edited photo! 
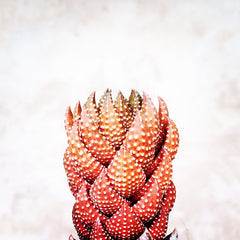
Take a look at some of the images from my Instagram page below!


